Translate

Showing posts with label Right-angle weave. Show all posts

Thursday, February 3, 2022


I recently revisited my Heart-to-Heart bracelet pattern, since Valentine's Day is coming up soon. I thought I would see if I could re-arrange the two hearts to make a necklace. 

Here is the original bracelet.
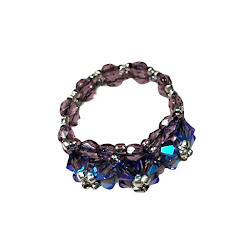
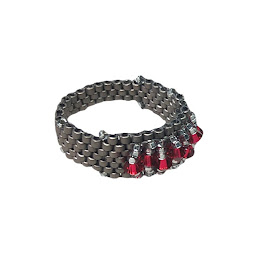
Heart-to-Heart Bracelet designed by Janet Palumbo

The pattern was published in BEADWORK magazine, Aug/Sept 2013 and it was the first of our patterns to be published, so it holds a special place in my heart!

The pattern, with more photos and updated instructions, is available for purchase from our Etsy shop at this link if you would like to make your own.

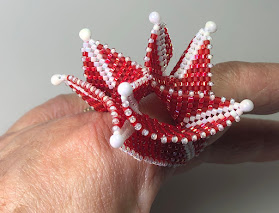
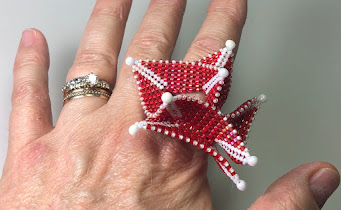
For the necklace, which is for sale at the Red Tulip Gallery in New Hope, PA and from the gallery's online store, I thought I would make the hearts two different colors and intertwine them, since I was going for a Valentine's Day sale! I used luminous raspberry Czech farfalle beads for one heart and white Japanese peanut beads for the other. Both hearts have Swarovski crystal pearls in Rosaline for the embellishments. I finished the necklace with a heart-and-arrow shaped toggle clasp in pewter.


Heart-to-Heart Necklace by Janet Palumbo


While I was working on this necklace, I got the ideas for two more necklaces--a bead embroidered heart that can be worn as a pin or as a pendant on your favorite chain, and a delicate little necklace made with tiny faceted crystal flowers with a red and pink color scheme that worked out beautifully. Both necklaces are also for sale at Red Tulip Gallery and online.


Bead embroidered heart pin/pendant
by Janet Palumbo

The back, showing the pin with a bail.


Tiny Crystal Flowers Necklace,
by Janet Palumbo


Tiny Crystal Flowers Necklace, detail

Sunday, October 31, 2021

Ring Binge

 I went on a ring binge. I haven't made any beaded rings in a long time, but I decided I would make a few to sell at the Red Tulip Gallery in New Hope, PA. I had a lot of fun making the rings, trying several different techniques in the process. 

First up, a Lapis Lazuli solitaire bead surrounded by turquoise Swarovski crystals and silver seed beads. To make this ring, I used bead weaving. First, I bezeled the lapis lazuli bead. Then, the band was made using right-angle-weave and a second pass through the band to fill in the "gaps" along the top and bottom edge with more silver seed beads. Passing through the band several times stiffened the beadwork enough so that I was happy with the results. I want all of the bands to be firm. Notice that I used large silver seed beads instead of crystals at the center back--for comfort when wearing the ring.


Continuing with Swarovski crystals, I made a band with a dozen tanzanite AB2X crystals across the top. The band uses Czech fire polished beads and more silver seed beads. It is also right-angle-weave, but stitched lengthwise instead of across the width as in the Lapis ring. This also makes a very comfortable and almost rigid band. This ring is so sparkly, it was hard to photograph!


A peyote band simply embellished with 7 scarlet red Swarovski crystals is next. Matte silver Delica beads were used for the band. I wanted the peyote-stitched band to be narrow at the back, for comfort when wearing, so I stepped down the width of the band twice.


While I was on my ring binge, I dug through my UFOs (UnFinished Objects) to find a "Flying 5 Wing Cocktail Ring" that I had almost finished a few years ago when I was trying out the techniques of the Contemporary Geometric Beadwork project. Kim Van Antwerp's instructions for this fabulous ring are available in the CGB free pattern library here. I finished the ring and I really love it. It is surprisingly comfortable to wear, as are all of the beaded rings I've made--probably because of the flexibility of the beadwork. This ring isn't for sale, as I plan to always wear it when I'm staffing at the Red Tulip Gallery, in the hopes of starting conversations about my beadwork!

I thought a ring made with a warped square would be interesting and I wanted to use Swarovski crystals at the center of the warped square. So I did a little experiment with a raised center and it worked! I started at the center of the warped square with 4 Swarovski crystals. After a few rounds, I made a "point edge" and then 3 more rounds of peyote for the "sides." Then I continued with the increases for the warped square. This is also surprisingly comfortable and easy to wear, even though it is a large ring.

Finally, a ring made using Artistic Wire, a coin-shaped freshwater pearl in a beautiful burgundy color, and gold seed beads. The violet Artistic Wire (28 gauge) peeks through the gold seed beads and the effect is very nice! Because I wove the band with wire passed through the beads, it is completely rigid. I like the simplicity of the single coin pearl.

The rings are currently for sale in the Red Tulip Gallery and through my section of the gallery's online store


Sunday, August 10, 2014

Heart-to-Heart Bracelet

The first of our designs accepted for publication was Janet Palumbo's "Heart-to-Heart Bracelet" which was featured in the Aug/Sept 2013 issue of BEADWORK magazine.
Heart-to-Heart bracelet by Janet Palumbo

For this bracelet, I used Czech farfalle beads, Swarovski crystal pearls, seed beads, and Czech fire-polished beads. I figured out a way to take simple right-angle weave strips of farfalle beads and shape them into curves to create heart shapes, ovals, and circles. Using the peanut-shaped farfalle beads, I was able to achieve a look that is similar to cubic-right-angle weave but without quite so much work! I hope many beaders enjoy making this bracelet!

Kits for this bracelet, in both the Magic Violet and Copper colors, will soon be available on our Etsy shop, 2BeadsRBetterThan1.

The kits available from our Etsy shop include two variations for the clasp used in the Heart-to-Heart bracelet and I would like to share these variations with everyone who might use the published instructions to make this bracelet.

The clasp is a bead-and-loop type, but for security it uses two beads that go through one ring made of farfalle beads, using RAW stitch. Getting the clasp ring just the right size is a little tricky and relies on culling your farfalle beads to choose some of the fatter ones. If that is too fussy for you, here are a couple of alternative ways to finish the clasp.

Pass back down through the 4th bead added.
Variation 1:
Don't change a thing from the published instructions, but add a second loop of 15º beads. To make the second loop, after adding the two clasp fringes, weave half way around the final RAW unit so that the thread exits the farfalle bead in the last RAW unit that is opposite the farfalle bead that has the two fringes for the clasp. Pick up 27 size 15º beads; pass back down through the fourth bead picked up, making a loop of 24 beads. Pick up 3 size 15º beads; pass through the farfalle bead. Repeat the entire thread path twice to reinforce, then secure and trim the thread. 

Ready to pick up the last 3 size 15º beads.
To use the clasp, you pass only the 6mm bead on the long fringe through the RAW farfalle ring. Then pass both 6mm beads, one at a time, through the second loop made of 15º beads, starting with the short fringe. Using this variation, you don't need to fuss with the size of the RAW farfalle ring since only one of the 6mm fringes needs to fit through it. But you have the security of the second loop: once you pass BOTH 6mm beads through it, they will be tight enough to not slip back out easily.

The completed loop

Variation 1: only the long fringe goes through the RAW ring;
both fringes go through the second loop 
Variation 2
Make the RAW farfalle ring larger than the published instructions and make the two clasp fringes longer. Then, add the second loop of 15º beads (as in variation 1). With this clasp variation, you will pass both of the fringes through the RAW ring and then pass both of the fringes through the second loop.


  • First, when you make the RAW farfalle clasp ring, add one or two more RAW units so that when you close up the rings there are 13 (or 14) farfalle beads at the center of the ring. While the two fringes pass snugly through the original 12-unit ring, this 13- or 14-unit ring is large enough to allow both 6mm Czech beads to pass through easily.
  • Second, when you make the two clasp fringes, make each of them longer than the published instructions. For fringe 1, string 24A, 1E, and 1A. Complete this fringe as in the magazine, except you will pass back through 21A. For fringe 2, string 32A, 1E, and 1A. Complete as in the magazine, passing back through all but the last 3A before adding the final 3A.
  • Finally, weave half way around the final RAW unit of farfalle beads so that your thread exits the farfalle opposite the one to which you just added the fringes. Follow the instructions for Variation 1 above to add the loop of 15º beads.


To use the clasp, pass the long fringe through the RAW ring first and then pass the short fringe through (they should fit through this large ring easily). Then pass the long fringe through the loop of 15ºs, followed by the short fringe. This variation is easier to use and very secure!
Variation 2: Larger ring and longer fringes make this easy to use and
very secure. Both fringes pass through the ring and the loop.