Translate

Showing posts with label earrings. Show all posts

Sunday, October 17, 2021

Black Spinel Collection

At Bead Fest Philly this year, I bought several strands of tiny faceted black spinel gemstone beads. I love black spinel--it is a pure black and has a lot of sparkle! My intention was to use these beads to make a crocheted rope necklace to sell at the Red Tulip Gallery. But I wasn't happy with the little samples I made, so I needed to try something else. I found that I could knot these tiny faceted beads onto silk cord and I could do some bead weaving with them as well (if I used a size 13 needle and the finest bead thread). The results: my black spinel collection of necklaces and earrings, available at Red Tulip Gallery

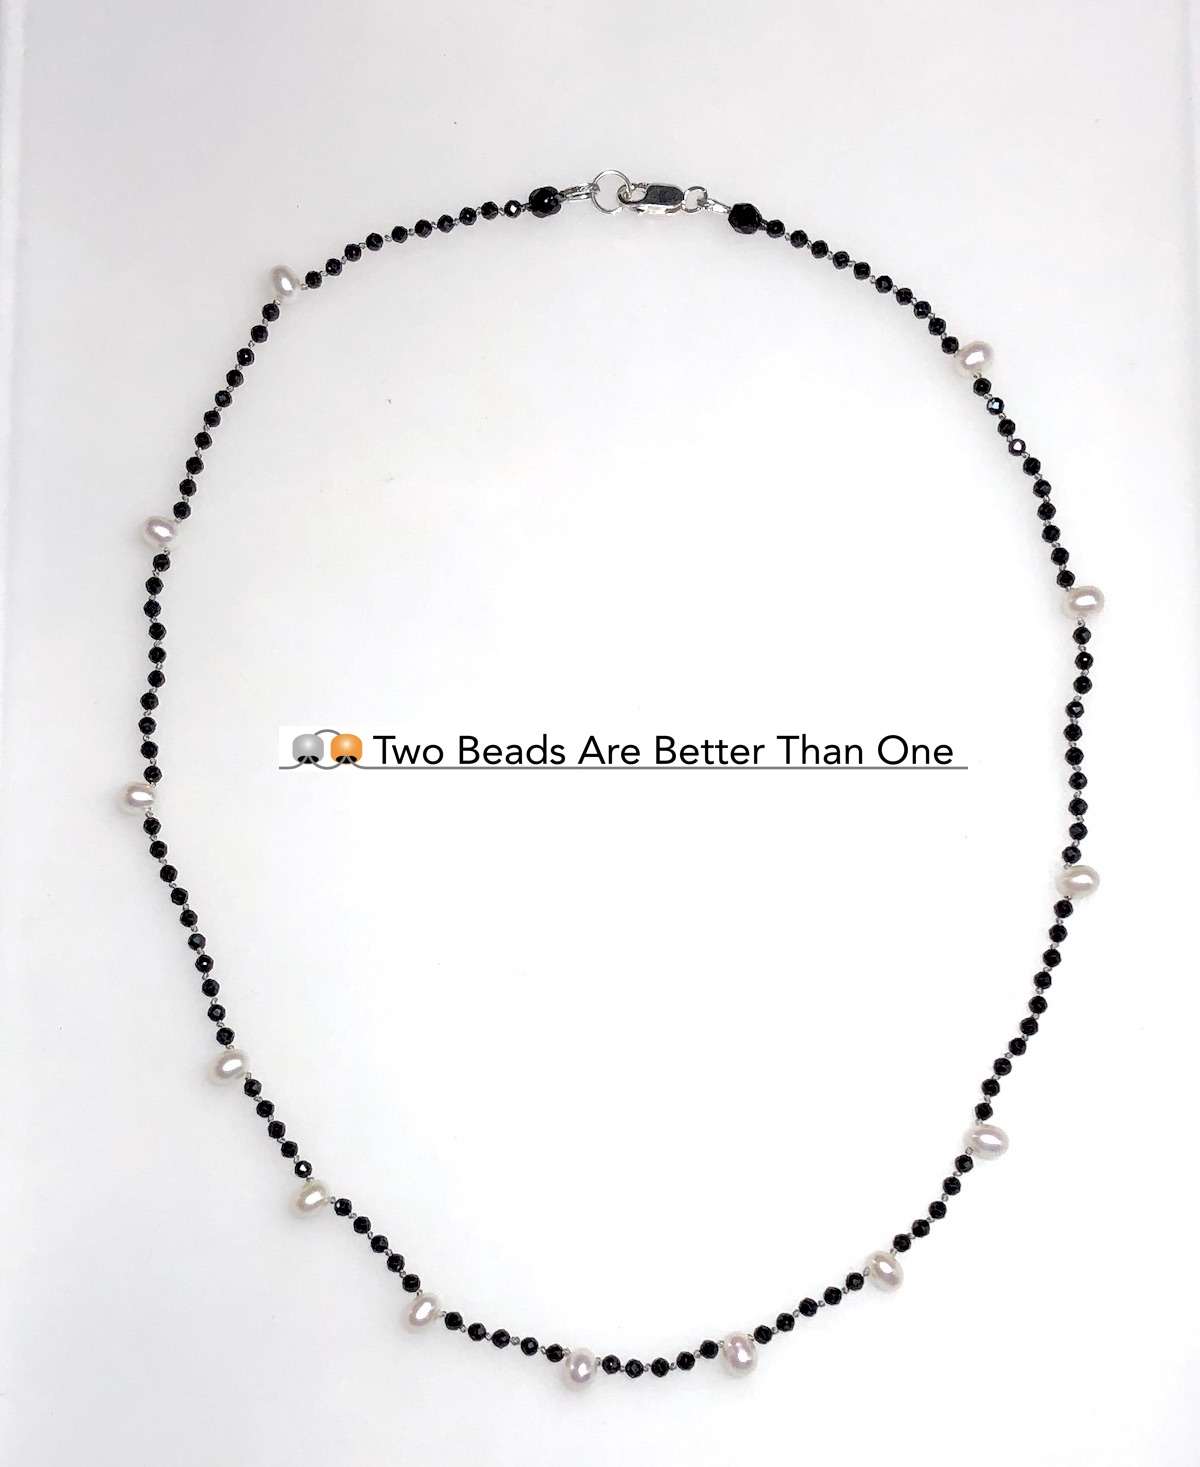
Using silk bead cord with a tiny wire needle attached (because the holes in these 2mm spinel beads are really tiny), I knotted the spinel beads onto the silk, one at a time, with a top-drilled freshwater pearl in  between groups of 10 spinel beads, and then, to increase the rhythm at the center of the necklace, between groups of 5 spinel beads. This necklace sold a few days after I put it in the gallery.

Using brick stitch, I created a circle motif that I used in a pair of earrings and as the pendant for a necklace. The circle motif pieces use tiny faceted silver Czech charlotte seed beads in addition to the spinel.
Using gold Czech charlotte seed beads, spinel, and rice-shaped freshwater pearls, I created this square motif with a triple fringe at the bottom. It made an elegant pair of earrings and worked well as the pendant for a necklace, too.

Little pearl and spinel flower motifs form the center of this necklace, while pearls surrounded only by the gold Czech charlotte beads carry the rhythm through the rest of the necklace.  Of course I had to make pearl flower earrings to match.

Finally, a pair of silver "starflower" earrings and my personal favorite, the gold triangle earrings, in which 14k gold-filled hammered triangles support an inverted triangle made of brick-stitched spinel beads with a freshwater pearl drop.

Bead weaving is usually done with glass seed beads and crystals, but using gemstone beads is possible, if you find the right combination of gems, needle, and bead thread.


Thursday, January 7, 2021

Bead Weaving class online, Princeton Adult School, March 2021

Diamond Lace Necklace 
in Topaz/Royal Purple


We will be offering a Bead Weaving class in March 2021 through the Princeton Adult School

For details about the class and registration information, go to:
PAS Bead Weaving class

For this class, Reem has designed an elegant necklace made with hundreds of Czech fire-polished crystals, Japanese seed beads, and a beautiful pear shape crystal. Janet designed the coordinating earrings. We will be demonstrating every step on Zoom so that you can bead along with us. The class is suitable for beginner and experienced beaders.

The materials kit, containing over 600 Czech fire-polished crystals as well as the other materials needed to complete the projects, is available for order from our Etsy Store. The materials kit is offered in two color options: Topaz & Royal Purple or Cobalt Blue & Fuchsia. Students who register for the class will need to order their materials kit by February 15, to allow time for delivery before the first class on March 2.
The three elements of the 
Diamond Lace Necklace
in Cobalt Blue/Fuchsia


We will be making three components for the necklace: 

1) a netted rope, filled with hundreds of Czech crystals (top of photo);

2) a shaped beaded component that gives you the opportunity to learn the Prismatic Right-Angle Weave (PRAW) stitch (middle of photo); and

3) a large pear shaped crystal pendant (bottom of photo) that will be beautifully bezeled using seed beads and crystals.


We will be combining all three of the elements into one fabulous necklace (photo at top). Students may also choose to assemble the elements in different ways, making jewelry to suit individual tastes. For example, the netted rope necklace can be worn on its own. The PRAW tube and bezeled pear shape crystal can be combined and strung on a chain, a ribbon, or other material supplied by the student. Or string the PRAW tube on a ribbon and keep the bezeled crystal as a separate pendant to wear on your favorite chain.

PRAW tube and crystal pendant
on a wire necklace


PRAW tube on a chain


Netted rope necklaces

Matching earrings are included in the class. Students will make a beaded ball that matches the netted rope. They will then have the option of finishing the earring by adding fringes to make a tassel earring, or embellishing the beaded ball with a single crystal dangle.

Please join us for this sparkling bead adventure!

Tassel Earrings in Cobalt

Optional version of earrings

Tuesday, November 24, 2020

Fall 2020 Princeton Adult School Bead Weaving class

SuperDuo Twist Set
We've finished the Princeton Adult School Bead Weaving class for Fall, 2020. We taught the class entirely on Zoom, which worked surprisingly well! The students said they really liked being able to see us demonstrate every step, up close! We used a camera mounted right over the beading tray. It was great to see our "regulars" again and we welcomed some new bead weavers as well. Because the class was online, we were delighted to have some students from far away!

We made a set (necklace, bracelet, and earrings) using SuperDuo beads, seed beads, and faceted crystal rondelles. The patterns are available from our Etsy store, along with the last couple of kits.

The SuperDuo Twist Necklace has a central twisted section that uses a twisted tubular herringbone variation that we devised and which we haven't seen anywhere else. Usually, herringbone variation using SuperDuo beads has the beads oriented in a different way. This version looks like knitting. The stitch variation creates not only a twist in the tube but also an undulation that is very attractive. If you like it, check out the pattern on Etsy!


The SuperDuo Wrap Bracelet works up quickly and is super easy! We've designed it to wrap around the wrist three times and the instructions provide detailed row counts for every bracelet size.

The SuperDuo Swirl Earrings feature three colors of SuperDuos swirling around the beaded bead, which is embellished with a faceted rondelle at the bottom. This earring is also quick and easy.

We offered three different color palettes to the students. The purple and indigo combination was by far the most popular!


Sunday, July 22, 2018

Onion Earrings Tutorial

The Onion Earrings are made using true ring needle tatting.

You will need:
#7 (fine) tatting needle
Lizbeth size 20 tatting thread
11º Takumi seed beads (large-hole size 11º seed beads made by Toho)
3x4mm crystal rondelle
size 10 (1.3mm) steel crochet hook
needle threader

Most size 11º seed beads do not fit over the eye of the #7 tatting needle. But Toho makes a line of size 11º seed beads with a large hole; these are sold as "Takumi" seed beads. They come in many lovely colors and they are fantastic for tatting with beads because they fit easily over the eye of the #7 tatting needle, allowing you to add beads at any point in a tatted element. You can buy Takumi seed beads online.

In the pattern below, note:

B = put a bead on the needle
bp = make a bead picot with 1 bead
3bp = make a bead picot with 3 beads

My next blog post will go into detail about the right side and the wrong side of true ring needle tatting and tips that will help you get the best results. For this tutorial, note that the first ring is made using Reverse Order Double Stitches (RODS). That is, begin each double stitch with what is usually the 2nd half of the double stitch and follow it with what is usually the 1st half of the double stitch.

Slide a crystal rondelle onto the ball thread before starting. It is NOT inside the first ring, so slide it 5 feet down the thread. Use the first 4 feet of thread for the rings. The ball thread, including the crystal, is used for the chains.

Begin True Ring Needle Tatting
Note: To begin true ring needle tatting, the orientation of the needle thread must be as shown below. That is, the double stitches are formed using the thread coming from the needle, not from the ball (as in usual needle tatting).

RODS for ring 1

1. Ring of RODS: 12, p, 3, p, 12; close, RW.


Reverse order double stitches on the needle for Ring 1. 
Using the reverse order provides a 
smooth close for the true ring.

2. Chain: 1, (B, 1) x 8; close, DNR.

3. Clover of 3 rings:
Since we didn’t RW after the chain, the clover rings are worked on the right side. So these rings are not made with reverse order double stitches. But to keep the ring close symmetrical, end each ring with an extra 1st half double stitch! 

String 3 beads for the bead picot before beginning each ring. That is, slide 3 beads onto the tatting needle and push them down onto the needle (ring) thread. 

To join the chain just made to the ring, use a crochet hook to pull up a loop of the needle thread (start with thread under the picot) and transfer that loop to the needle, as shown.

a.     Ring: [string 3 beads] 6, 3bp, 4, p, 2; close; DNR.
b.     Ring: [string 3 beads] 2, j, 4, 3bp, 4, p, 2; close; DNR.
c.     Ring: [string 3 beads] 2, j, 4, 3bp, 6; close; DNR.


Normal order of double stitches, because the clover rings are worked on the right side. Note the extra 1st half double stitch at the end.

4. Slide up the crystal on the ball thread. Join the ball thread to the picot of the large ring (this is a non-locking join).


5. Chain: 1, (B, a) x 8; close. To join this chain to the beginning of the ring, pass the needle through the base of the ring, where the first chain starts.

6. String 6 beads on the needle and slide them down to the tatting. Tie the ball thread and the needle thread in a square knot, enclosing the 6 beads in a loop for the earring finding. Cut the ball thread and use a needle threader to hide the thread ends; trim the thread. 

7. Apply fabric stiffener, if desired, or wet block the completed motif.


Onion motif earrings made using True Ring Needle Tatting

Note that all rings and chains have the right side showing!
Janet Palumbo